

![]() RPG CHARACTERS
RPG CHARACTERS
![]() Wastiche, Cadrusat
Wastiche, Cadrusat
![]() Magnus the Stod
Magnus the Stod
![]() Psion Stalker
Psion Stalker
![]() Nudie Girl
Nudie Girl
![]() Busty Susan
Busty Susan
![]() Prince Almare
Prince Almare
![]() EXPERIMENTS
EXPERIMENTS
![]() Rock-Oni
Rock-Oni
![]() Otyugh Reborn
Otyugh Reborn
![]() 15mm Paladin
15mm Paladin
![]() Blue Meanie
Blue Meanie
![]() OLDER EFFORTS
OLDER EFFORTS
![]() Plague Bearer
Plague Bearer
![]() Plague Victim
Plague Victim
![]() Fluffy the Demon
Fluffy the Demon
![]() Chaos Warrior
Chaos Warrior
![]() Bubba Junior
Bubba Junior
![]() Slaanesh Champion
Slaanesh Champion
![]() Otis the Thing
Otis the Thing
![]() Undead Dragon
Undead Dragon
![]() Chronopia Orc
Chronopia Orc
![]() Everhungry
Everhungry
![]() Demon Steed
Demon Steed
![]() Karlinn
Karlinn

![]() Great Cthulhu
Great Cthulhu
![]() Great Cthulhu (2)
Great Cthulhu (2)
![]() Great Cthulhu (3)
Great Cthulhu (3)
![]() Great Cthulhu (4)
Great Cthulhu (4)
![]() The Irdulan
The Irdulan
![]() Koshka (RPG Char)
Koshka (RPG Char)

![]() Mini Photography
Mini Photography
![]() Converting Minis
Converting Minis
![]() Fiber Optic Lights
Fiber Optic Lights

![]() REFERENCES
REFERENCES
![]() Arms & Armor
Arms & Armor
![]() Book Reviews
Book Reviews

![]() All About Me
All About Me
![]() Frothing FU!UKers
Frothing FU!UKers
![]() The Addict's Lair
The Addict's Lair
![]() The NEW Lair
The NEW Lair
![]() Send Feedback
Send Feedback
![]() Cool Mini Ratings
Cool Mini Ratings

![]() HOBBYISTS
HOBBYISTS
![]() Miniature-Painting
Miniature-Painting
![]() Jen Haley, Paintrix
Jen Haley, Paintrix
![]() Dirk Stiller
Dirk Stiller
![]() Mini-Painter List
Mini-Painter List
![]() Glyn Evan's Site
Glyn Evan's Site
![]() Deus Ex Machina
Deus Ex Machina
![]() Holger Schmidt
Holger Schmidt
![]() Warpaint Studio
Warpaint Studio
![]() Craig Stocks
Craig Stocks
![]() Blaze's Corner
Blaze's Corner
![]() COMPANIES
COMPANIES
![]() Reaper Miniatures
Reaper Miniatures
![]() RAFM Miniatures
RAFM Miniatures
![]() Dixie Art
Dixie Art
![]() Fantization Store
Fantization Store
![]() Cyberdungeon
Cyberdungeon
![]() Hudson & Allen
Hudson & Allen
![]() MD. STORES
MD. STORES
![]() Dream Wizards
Dream Wizards
![]() Games,Comics,Stuff
Games,Comics,Stuff
![]() REFERENCE
REFERENCE
![]() Miniatures Atlas
Miniatures Atlas
![]() Frothers Unite! UK
Frothers Unite! UK
![]() Cool Mini, or Not?
Cool Mini, or Not?
![]() F.A.R.P Resource
F.A.R.P Resource
![]() The Miniatures Page
The Miniatures Page

 After you've painted a bunch of figures you'll start looking at them and thinking "You know, this one would be so much cooler if only..." Well, there's nothing stopping you from changing it. I use my figures mostly with RPG's and tend to need a lot of customized pieces. The problem with running your own campaign setting is that you can't yank pieces off the shelf. Over the years I've converted hundreds of figures. So let's see how it's done.
If you have a general idea of what you'd like to try to build you can then go digging around for the right bits. You tend to get more flexibility with multi-part figures, since they're already chopped to bits. If you're just going to go for a weapon swap or a head swap these are the best to work with. They're also good if you just want to change the pose a little bit. Still, don't be afraid to hack off a piece of a single-part figure if it's got the part you need! Just make sure to study how that part is connected- is there a nice 'break point' between it and the body of the figure? If not, are you comfortable filling in the missing bits with epoxy putty? If you're not comfortable hacking metal to bits you might want to take a look at some of the plastic and resin models out there. Citadel has an extensive range of plastic figures already in "bits" form. The heads, arms, legs, and torsos are separate. They also pack the sprues with lots of extra things like alternate weapons, shields, spikes, little treasures, etc. Fenryll makes a line of resin figures that are easy to chop up for conversions as well. Don't forget about regular old model kits either. For that Necromunda or Inquisitor conversion you'd be surprised at some of the useful parts in an old Revelle car kit. The best general purpose sci-fi parts for model kits tend to come from the Glencoe Space series. RAFM's Call of Cthulhu line is a good one for weird parts like tendrils, tentacles, claws, guts, and creepy heads. As a bonus, each of their blister packs comes with a little "thingie" that's thematically tied to the main figure (for example the Great Race of Yith figure has a weird trapezoidal door, the Cthonian comes with a little baby Cthonian, etc)
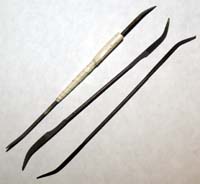
 Multipart figures are like metal legos Big kits give you the most flexibility with conversions. They're seldom a single-piece figure because of the nature of molding something big and complex. For demons and devils you should track down the old Global Games "Inferno" line of miniatures. The Fiends from that line were all multi-part figures separated at the limbs, torso, wings, and head. They're also the same scale as Reaper's Abyst and Citadel's Bloodthirster. If it's just a weapon swap you need then check out Reaper's Weapon pack series. Each blister contains a couple sprues of different weapons for 28mm figures. Each is just thick enough that you can cut them to fit the hand of another figure and pin them in place (using a straight pin and a 1/32" bit). If you still can't find that perfect weapon or staff for your conversion maybe you can make it. Most rod-like items can be made from brass tubing. A simple staff can be made with 3/32" brass tubing with two small 1/16" sections slid onto the ends. You can cap the very ends with the heads of straight pins.
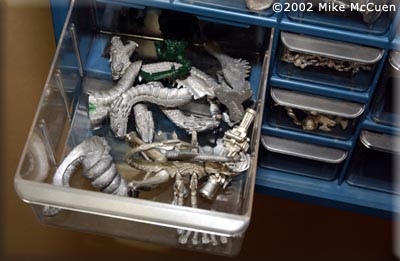 Keep everything! Remember to save everything! You never know what might be handy. Just because all that's left of a donor dragon is a neck doesn't mean that you won't have a use for it later. Hell, you might make it a tentacle arm, or cut it in half as a carapace for something. Keep it all, no matter how small.
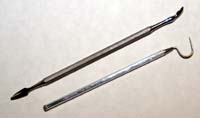
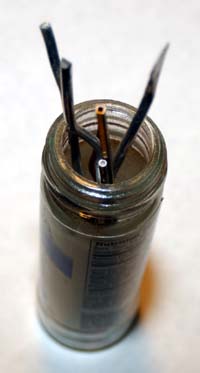
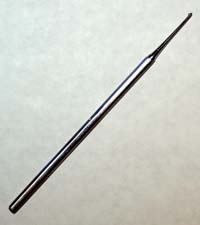
Here are some basic tools you will need before you can begin customizing your figures:
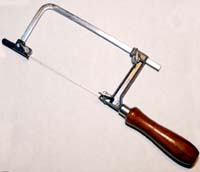
Jeweller's Saw
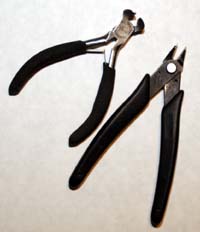
Flush-Cut Snips
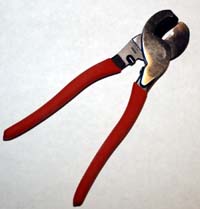
Heavy Duty Cable Cutters
Small Pipe Cutter
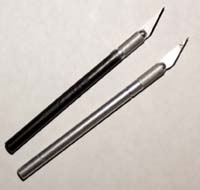
X-Acto Knife
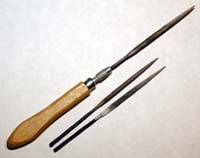
Needle Files
Riffler Files
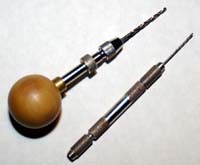
Pin Vise
Jeweller's Bits
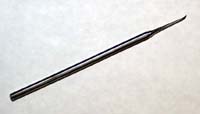
Sculpting Tools
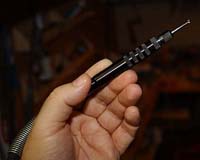
Dremel Rotary Tool
Safety Glasses
 Some texturing tools made from Brass Rod
Brass Rod Grab Bag
Epoxy Putty
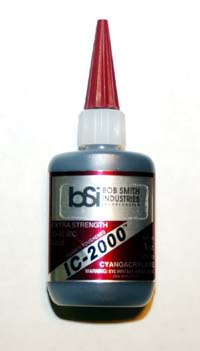
Rubber Reinforced Cyanoacrylate
Cyanoacrylate Applicator
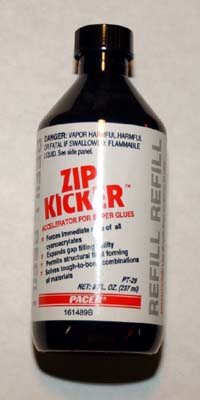
Cyanoacrylate Accelerator
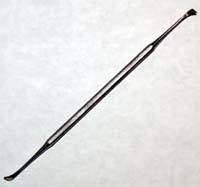
Seam Scraper
Scribing Tool
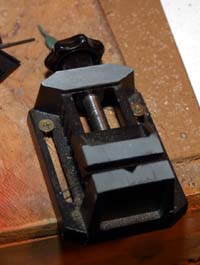
Hobby Vise
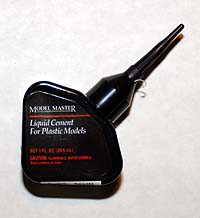
Plastic Cement
Romex Wire
Now that you've got your tools and basic supplies (you DID rush out and buy them all, right?) you're ready to go over the basic techniques for conversions.
Head Swap
 A super simple head swap with no epoxy work To mount the new head drill a hole in the center of the neck. Put a piece of wire or brass tube in the hole and cut it down until just a tiny bit is showing. Paint a little black paint on the neck of the figure that will receive the head. When the paint is dry you'll line up the new head and push it into place. Push firmly and slightly wiggle the head. The small bit of wire or rod protruding will scratch off the black paint and show you where to drill the receiving hole. Now that you see where the hole goes, drill it out. Make sure to match the angle you drilled for the head's hole. Now wipe off the black paint. Cut a new pin out of a piece of rod or wire that will go all the way inside both holes. Test fit the head to the body. If there's only a hairline between the head and neck then the Rubber Reinforced Cyanoacrylate glue should fill the gap well enough. If the gap's pretty bad you'll need to make a tiny ball of Epoxy Putty and roll it into a teensy cylinder (about half the size of a grain of rice). Using a sculpting tool, push this epoxy onto the neck of the body to make a "gasket". Keep it close to the center hole. When the head is pushed down the epoxy will squish out around the neck and fill the gap like spackle. Now that the test fit is complete it's time to put it together for real. Put a drop of the Super glue on one end of the pin and insert it into the hole. Capillary action should help it fill the hole a bit. Now put a slightly bigger drop on the other end of the pin and then put it in the hole on the neck of the body. If you had to use the epoxy putty to fill the neck-gap you'll need to scrap the excess down a bit and then smooth it over with the sculpting tool (the tear-drop shaped one is best).
 Mismatched hair? How about mismatched BRAINS! After all the glues are dry you can address the problem of mismatched hair. If the hairstyles really just can't be matched between figures you should take a file and file off the hair of the new head while it's still on its original figure. It will make it easier to make new hair after it's transplanted. You won't have to be too neat about it, since you'll cover it up with Green Stuff anyway. To make hair mix up some Green Stuff epoxy and roll it into a ball about the size of the head. Now pinch the ball slightly on one side to make a kind of bowl/spoon shape. Put this on the head of the figure, with the head sitting in the bowl depression. Now take an Xacto knife or a flat, pointed tool and begin tracing lines where the hair would "flow". You'll see that you're dragging the epoxy down while leaving a hair texture. Use other figures as reference if you need to. If matching the hair of the two figures make sure your tool ends up pulling the epoxy down into the figure's existing hair, and continuing with it's "grain". If it gets a little ragged you should make sure your tool is lubed with saliva or mineral oil (don't lick the tool!). If it's still getting grainy you can try brushing across it with an old brush to smooth it out a bit (dip the brush in oil).
If you've got a figure with something in the way there (like a cape or a backpack) you might want to find a different donor. If you're comfortable sculpting drapes out of Green Stuff, then cut through that cape with impunity- or the backpack, you can always cover it up. If you're going to do a cape to hide stuff just take a dremel and grind off everything that's not going to be seen. The cape will get more adhesion and be smoother. Using the basic cut and match system detailed in the "head swap" section, cut and match your parts for the torso and legs change.
 Here's where making belts comes in handy Now, if the gap is visible between the two sections, and there's no obstacles in the way you can apply a belt to the figure to hide the seam. Roll up some Green Stuff and then flatten it out. Cut a thin ribbon out with the Xacto knife and then apply it to the seam, making sure to smooth out the inside bit to produce a slight concave look. After the epoxy begins to cure, take the Xacto blade and press it flat against the top of the belt. Slowly lift and press again a little further along, moving across the waist. This will put a hard edge on the top of the belt. Repeat for the bottom. Using a tiny piece of brass rod which has been sealed on one end with a smear of Super glue, press in the belt holes on one side of the belt. This will make clean little punctures. Now take a well lubed burnishing tool and re-smooth the middle of the belt to get rid of any bumps caused by making the holes. To make the buckle you'll need to roll a thin hairlike cylinder of Green Stuff. On your table shape this into a square with an Xacto blade. Cut off any excess and press the square closed. Transfer this, gently, to the figure with a pin. Make sure the pin is stuck in the part what will be covered by the "flapping end" of the belt. Once the square is just lying in place, gently press the "hidden section" flat into the belt with a tool. Make another tiny strip of belt like you did before, but shape one end into a slightly rounded tip. Transfer this to the buckle and "tuck" the flat end into the buckle so that it looks like it's under it. The "flapping end" should just be lightly pressed into place, and then have holes stamped in it. Snip the very tip off of a staight pin and insert this into the section of the belt that is "tucked under" the buckle. There, all done. Practice this on a piece of brass tubing first if you need too.
 No belt or cape, so match the skin texture If there's no clothing or armor to hide the join, then try your best to match the texture of the skin. Brass rods of various sizes can be pushed into Green Stuff to make a pebbled texture (seen on dragons and demons), a pin dragged across diagonally can be used to make diamond like "scales" like those seen on Abyst. If you press in the top "points" of the diamond shapes with the tip of an Xacto it helps them look real. To make a cape or match a cut cape you'll need to roll out a flat piece of Green Stuff onto a sheet of wax paper. Sit this in the freezer for a minute or two to stiffen it up. Cut the shape of the cape with the Xacto knife and then "test fit" it for size on the figure. You can lightly tack it down around the shoulders at this point and then bend and shape it to make folds. Once the basic cape is cut to fit on the figure's shoulders and drape ok on it's body, let it cure. Then make a collar for the cape the way you made the basic belt strap. Details like runes or borders can be made by rolling out a thin sheet of Green Stuff, chilling it in the fridge on wax paper, and then cutting out the shapes like little stencils. These can then be transferred to the cape. Alternatively you can cut them out of thin sheets of plastic or paper and glue them down. For capes please refer to other figures until you get a feel for it.
Make sure that the position of the wings won't unbalance the figure and topple it. Once you know where the wings will go, and can pin them in position use Green Stuff to smooth out where the wings join the figure. You can then try to match the feathers in a transition, or if the wings are in the back, add a long mane of hair to conceal the joins. The figure at the very top of this page shows wings added and the joins hidden by a mane of hair.
Limbs work the same way. If there's fur, match it with your hair sculpting. If there's only skin, try to match the texture- study how they might have made those shapes and then practice making them off the figure before you do the conversion.
I hope the above basic techniques will help you to customize your figures. Remember to practice with the Green Stuff- that's the most critical aspect of this work. Also, hoard every tiny little thing you can. You never know what might work.
 Head Swap, Torso/Leg Swap, Weapon Swap, and a tail! There's no end of possibilities out there, and no reason you should have to put up with "off the shelf" figures if what you want is clear in your mind. Good Luck, and happy modelling.
|