

![]() RPG CHARACTERS
RPG CHARACTERS
![]() Wastiche, Cadrusat
Wastiche, Cadrusat
![]() Magnus the Stod
Magnus the Stod
![]() Psion Stalker
Psion Stalker
![]() Nudie Girl
Nudie Girl
![]() Busty Susan
Busty Susan
![]() Prince Almare
Prince Almare
![]() EXPERIMENTS
EXPERIMENTS
![]() Rock-Oni
Rock-Oni
![]() Otyugh Reborn
Otyugh Reborn
![]() 15mm Paladin
15mm Paladin
![]() Blue Meanie
Blue Meanie
![]() OLDER EFFORTS
OLDER EFFORTS
![]() Plague Bearer
Plague Bearer
![]() Plague Victim
Plague Victim
![]() Fluffy the Demon
Fluffy the Demon
![]() Chaos Warrior
Chaos Warrior
![]() Bubba Junior
Bubba Junior
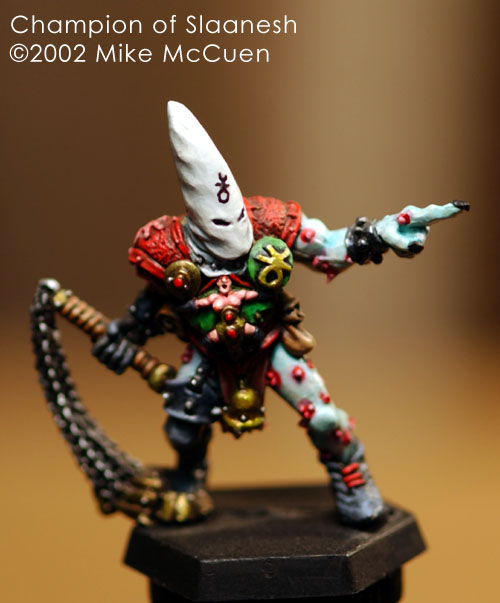
![]() Slaanesh Champion
Slaanesh Champion
![]() Otis the Thing
Otis the Thing
![]() Undead Dragon
Undead Dragon
![]() Chronopia Orc
Chronopia Orc
![]() Everhungry
Everhungry
![]() Demon Steed
Demon Steed
![]() Karlinn
Karlinn

![]() Great Cthulhu
Great Cthulhu
![]() Great Cthulhu (2)
Great Cthulhu (2)
![]() Great Cthulhu (3)
Great Cthulhu (3)
![]() Great Cthulhu (4)
Great Cthulhu (4)
![]() The Irdulan
The Irdulan
![]() Koshka (RPG Char)
Koshka (RPG Char)

![]() Mini Photography
Mini Photography
![]() Converting Minis
Converting Minis
![]() Fiber Optic Lights
Fiber Optic Lights

![]() REFERENCES
REFERENCES
![]() Arms & Armor
Arms & Armor
![]() Book Reviews
Book Reviews

![]() All About Me
All About Me
![]() Frothing FU!UKers
Frothing FU!UKers
![]() The Addict's Lair
The Addict's Lair
![]() The NEW Lair
The NEW Lair
![]() Send Feedback
Send Feedback
![]() Cool Mini Ratings
Cool Mini Ratings

![]() HOBBYISTS
HOBBYISTS
![]() Miniature-Painting
Miniature-Painting
![]() Jen Haley, Paintrix
Jen Haley, Paintrix
![]() Dirk Stiller
Dirk Stiller
![]() Mini-Painter List
Mini-Painter List
![]() Glyn Evan's Site
Glyn Evan's Site
![]() Deus Ex Machina
Deus Ex Machina
![]() Holger Schmidt
Holger Schmidt
![]() Warpaint Studio
Warpaint Studio
![]() Craig Stocks
Craig Stocks
![]() Blaze's Corner
Blaze's Corner
![]() COMPANIES
COMPANIES
![]() Reaper Miniatures
Reaper Miniatures
![]() RAFM Miniatures
RAFM Miniatures
![]() Dixie Art
Dixie Art
![]() Fantization Store
Fantization Store
![]() Cyberdungeon
Cyberdungeon
![]() Hudson & Allen
Hudson & Allen
![]() MD. STORES
MD. STORES
![]() Dream Wizards
Dream Wizards
![]() Games,Comics,Stuff
Games,Comics,Stuff
![]() REFERENCE
REFERENCE
![]() Miniatures Atlas
Miniatures Atlas
![]() Frothers Unite! UK
Frothers Unite! UK
![]() Cool Mini, or Not?
Cool Mini, or Not?
![]() F.A.R.P Resource
F.A.R.P Resource
![]() The Miniatures Page
The Miniatures Page

 It's the bane of our existence (by "our" I mean figure painters on the web); photographing those tiny little bastards and getting them to look at least a tiny bit like they do in real life. Few things are as frustrating as spending 20+ hours on a figure and then spending 200 more trying to get a photograph that does the paint job some justice. If you're going to post your figures to Cool Mini or Not? you've got to have a decent photo. If you're going to put up a vanity gallery (like yours truly), you need a good photo. If you're going to try to sell your work on e-bay then you most definitely better have a good photo! Now, I'm not a photographer. I don't claim to be one, and you can mark my experience with non-trivial cameras in weeks. What I'm presenting here is not "how to become a kick-ass photographer and get a job at Playboy". What it is, is a chronicle of what I've been doing on my quest to get a good photograph.
Up until a few weeks ago I used to use an AGFA ephoto 1280 digital camera for all my digital image needs. It was a good camera, if a bit slow. Ok, it wasn't a bit slow. It was glacial in its slowness. Still, I bought it back in 1997 and it worked OK, had OK resolution, and was adequate for general use. It could take pictures of my figures fairly well. The problem was that I had to get so damned close to the figure to get the Macro mode to work that I almost always blocked out the light. If I managed to set up enough light to shoot with I would "burn out" the highlights of the figure or make even the best Testor's Dullcote finish look like a quarter inch of Marine Epoxy. The other problem was that the images were limited to around 250-350 pixels in width. By the time I'd cropped out the non-miniature bits of the photo, there was precious little photo left!
 The best the AGFA could do! Now, the size limitation didn't bother me until I posted my first pictures to the Mini-Painter list and started getting the (standard) "Bigger Pics!" emails. I had also just posted some stuff to Cool Mini and noted that my pictures were too small to show all the detail, especially when compared with others up there. So I tried and tried to squeeze out more pixels from my poor old AGFA. This led me to what I like to call...
Yes, the AGFA drove me to insanity. I had spent a week building an elaborate base/diorama for my Visions in Color entry (thanks to Sintricat!) and decided to get a good shot of it for my web site. I turned on the bright lights, I put the camera on a tripod, and I positioned the piece against a nice backdrop by HR Giger. But there wasn't enough of the figure in the shot. So I moved the camera in closer. Still not enough. Then I leaned the tripod in and put a book under the (now) raised leg to stabilize it. Still- too small. I finally tilted the tripod way, way in and got "the perfect shot". I set the camera to a 5 second timer and pressed the shutter button. The camera took a very nice picture. This is all I have left to remember the piece "as it was". The tripod fell forward as its front legs slid. The camera bumped the piece, which slid back into the backdrop. The backdrop was actually a propped up book, which fell forward and knocked the diorama to the floor and then belly-flopped on top of it.
 Back to the workbench! The entire piece was smashed into its individual parts. Re-assembly and painting had to wait until I had finished setting the world's record for "longest utterance of the f-word" (half an hour, operatic). I snapped. I had had my eye on a new camera for two years and this tragedy spurred me to finally go buy it.
After putting it off for two years, I finally went and got my dream camera- the Nikon D1X. It's a professional digital SLR in the hands of a complete and utter novice. There's more camera here than I can comprehend. After years and years of being Mr. Smug-Computer-Guy I have finally found a technical arena that makes me feel like Jethro Bodine at CompUSA. But I know I'll grow into this thing and not out of it.
 Behold the beast in all its glory! I asked the guys at the camera store to hook me up with the best stuff for starting out in Macro and Close-Up photography. Eight thousand one-hundred fifteen dollars and thirty-two cents later I am armed for bear. I not only got the privilege of giving these fine people a hell of a lot of my money, but also got to see into the world of the camera geek. Let me tell you, Camera geeks make Unix geeks look like the friggin' AMISH. Once the guy was allowed to really open up on the subject of depth-of-field and perspective-correcting lenses it was like Al Gore was there campaigning for the nomination to the Camera Party. Around sixty hours later, when the camera guy stopped speaking I went to Border's books to buy some instructional supplements. I reviewed one key book, Macro and Close Up Photography Handbook on this site. I quickly set up my little "mini photo" studio. First I put up a nice 250w photoflood for ambient light. My studio is normally for painting in acrylics, and I have a set of four daylight color-corrected bulbs overhead. For photography this is just inadequate. Short of putting the friggin SUN in the room I needed to add as much light as possible.
 The main light sitting over the figure The figures are placed on a stand I made from a cheap-o broken tripod and a piece of plywood. The plywood has a 1/4" nut embedded in it to allow it to screw down onto a tripod for positioning. A graduated background was printed out on an HP-1220c inkjet and held up with a book-end and some tape. This background didn't work with every figure since the larger ones cast shadows onto it. The further back your backdrop is, the fewer incidents of long shadows you'll have. For really long backdrops an old window shade works nicely. Rolls of butcher paper are good as well. Next I set up two flashes for the Primary light and the Fill light. The primary light is a Nikon SB-28DX speedlight, and the fill light is a Promaster 7000m. I positioned reflectors around the figure to minimize harsh shadows from these lights. The Primary light is the light that's going to provide most illumination to the subject and provide most of the details. It should be above the subject and angled downward about 45 degrees or so. The Fill light is there to reduce the amount of harsh shadows caused by the Primary and "even things up", so to speak.
 The primary light- a Nikon SB-28DX Speelight The lens on the camera was a Nikon 105mm AF lens, which works great for the large figures, but tended to have depth of field issues on the smaller ones, or ones that had "extended bits" like upheld swords or long tails.
 Depth of field problem with the 105mm lens I switched to the Tamron AF70-300mm for most of the figures and that seems to have fixed the problem. Of course, this lens has a minimum focus distance of 1.3 meters! So I'm back against the wall when I take the pictures. This lens is the one seen on the camera in the photo. The camera was set to f10 and a speed of 60. A remote control shutter release cable was critical for this stuff, so the camera will not shake or vibrate during the exposure.
 Remote control is essential for this This setting has gotten me some good results- much nicer than when I first started out. The first day I got the camera I just let it decide what to do. Good thing I don't have to pay for film processing- I've shot probably a gigbyte of useless or wasted shots while learning. This is my latest "best mini" with the camera. Compare it to the shot from the AGFA at the top of this and see the difference. One thing that helped a lot was the addition of a "polarizing ring filter" which will work sort of like sunglasses for the camera. They only allow light to come in at a certain angle and that angle can be adjusted. The effect it has is to remove glare and gloss and intensify the colors. This makes blues and reds really pop out. It also gets rid of pure-white highlights from the bright lights and makes metallics look smooth.
 The new and improved Shawna Pretty remarkable improvement, I'd say. I know I have a lot more to learn about this subject, and as I get better or come up with useful advice I'll pass it along here. I don't expect everyone to rush out and spend a fortune on a new camera, but hopefully my extreme insanity may spur people to get the best out of their current one... at least until it brutally murders one of their show-pieces...
 My wife, Leigh reading the "Figmentia" symptoms and nodding along...
© 2002 Mike McCuen Questions or comments? Email mike@necrosys.com |